Updating Staff Directories
Adding an Administrator’s Bio
Sign in to your website
Click on the Website tab
The administrator bios are normally located in the information section, but that section may have been renamed to something else on your website by yourself or a previous website admin. You can find out the section where those bios are located by going to the staff directory page on the front end of the website and look for the first word after the domain name which will indicate which section the page is located in. The normal set up for the staff directory pages will show /information/directory/index in the URL path for that page. If it has a different name then you will need to go to that section to create the bios.

If the page is using the normal setup you will go to the information section and then directory. If it’s under a different name go to that section, for example if the URL path of the staff directory page is /staff/index then go to the staff section.
Click [add here] to the right under Options
From the content type drop down menu, select bio: manual
Enter the staff member’s first and last name in both the Name and Title fields
From the Featured in headlines drop down menu, select /information/directory/admin and click “Add”. If those bios are stored in a different named section then you will need to select that file instead of that admin file.

Click continue
Enter content into the appropriate fields
Click the button next to the headshot field to add the staff member's headshot. It’s easiest to find that if you upload the headshot in the directory section or the section where the staff directory is stored
In the text editor, add in the write up for the staff member’s bio
Click Save Changes
If you need to adjust the order of bios in the admin page you can do that by clicking edit content on the admin file in that section, select all of the files, click Stick, and then click and drag the files in the order you want them to display.
Video instructions:
Adding a Coach's Bio (Legacy and Themes 1.0)
Sign in to your website
Click on the Website tab
Click on the sports section
Click on a specific sport section. Example “bsb” for baseball
Click on the coaches section
Click [add here] to the right under Options
From the content type drop down menu, select bio: manual
Enter the coach’s first and last name in both the Name and Title fields
From the Featured in headlines drop down menu, select /sports/SPORT/coaches/index and click “Add”

This will add the coach to the coaches' pages for that sport. You can also add them to that file by going to the index file, click edit content, select the coach, and click Add:

Click continue
Enter content into the appropriate fields
Click the button next to the Headshot field to add the staff members headshot. It’s easiest to find that if you upload the headshot in the coaches section.
In the text editor, add in the write up for the coach’s bio
Click Save Changes
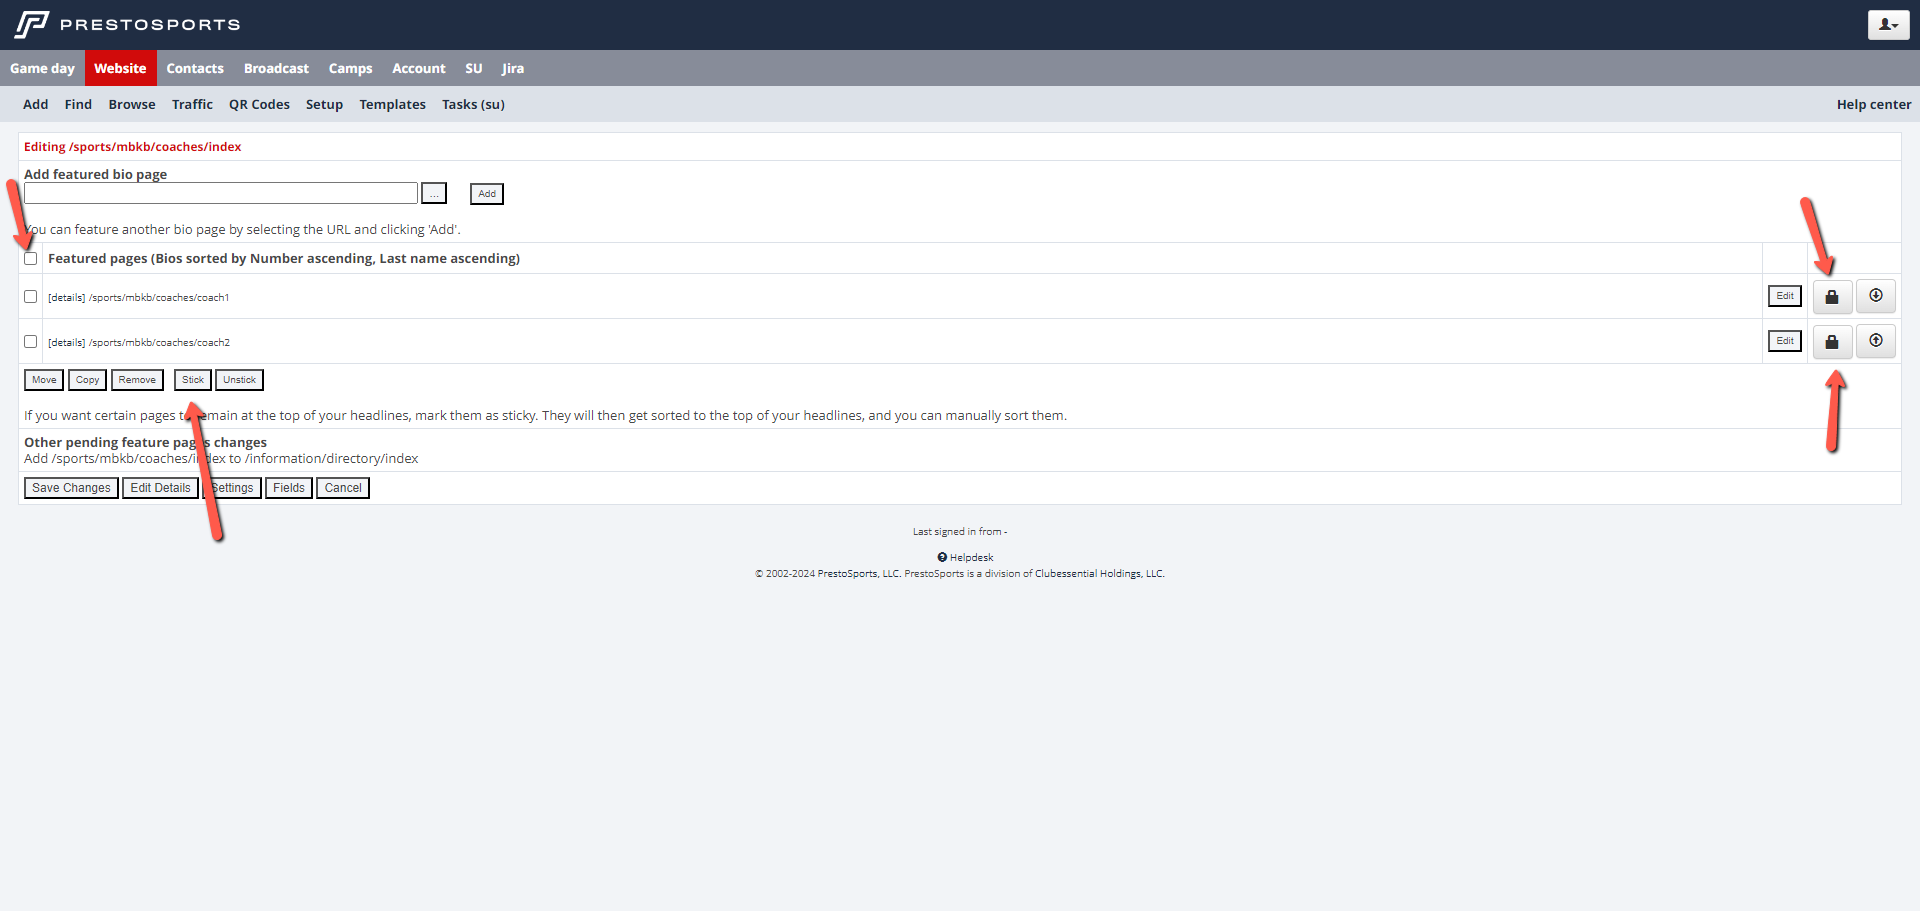
If you need to adjust the order of coaches on the coaches page you can do that by clicking edit content on the index file in the coaches section, select all of the files, click Stick, and then click and drag the files in the order you want them to display. When you set them to stick you will see the pin icon on the right side of the page next to the edit button change to a lock icon as shown below:

Video Instructions:
Adding a Coach's Bio (Themes 2.0)
Sign in to your website
Click on the GameDay tab
Navigate to the sport and season you want to add the bio to
Click on the Coaches tab
To set the fields that will display for the coaches click Edit settings and enable the desired fields. For more information on custom fields you can view this Help Center page
Click Add one coach
Fill out the coach’s bio information in the selected fields
You can put a text write-up for the coach in the Bio section on the page
Click Save Changes or click Save and add another to create the coach’s bio
These bios now will display on a specific season page for coaches. This is different than the previous setup where each sport would have a single coaches page that would just be updated when new coaches were add/removed. That page can be found within the season section, within the sport section, with a filename of “coaches”. For example the women’s basketball coaches for the 2024-25 season would have this URL path- /sports/wbkb/2024-25/coaches
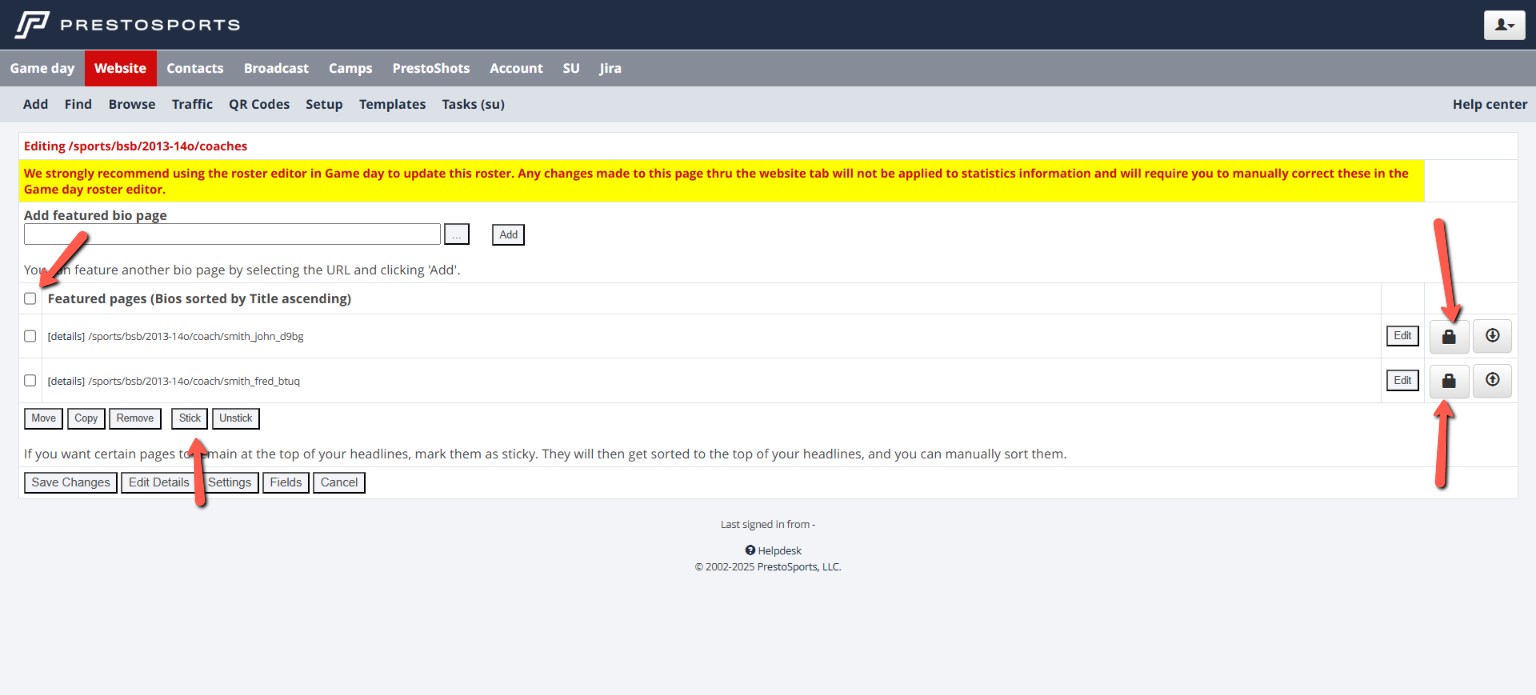
If you need to adjust the order of coaches on the coaches page you can do that by clicking edit content on the coaches file, select all of the files, click Stick, and then click and drag the files in the order you want them to display. When you set them to stick you will see the pin icon on the right side of the page next to the edit button change to a lock icon as shown below:

Video instructions:
Updating a coaches’ section to the new school year (Themes 2.0)
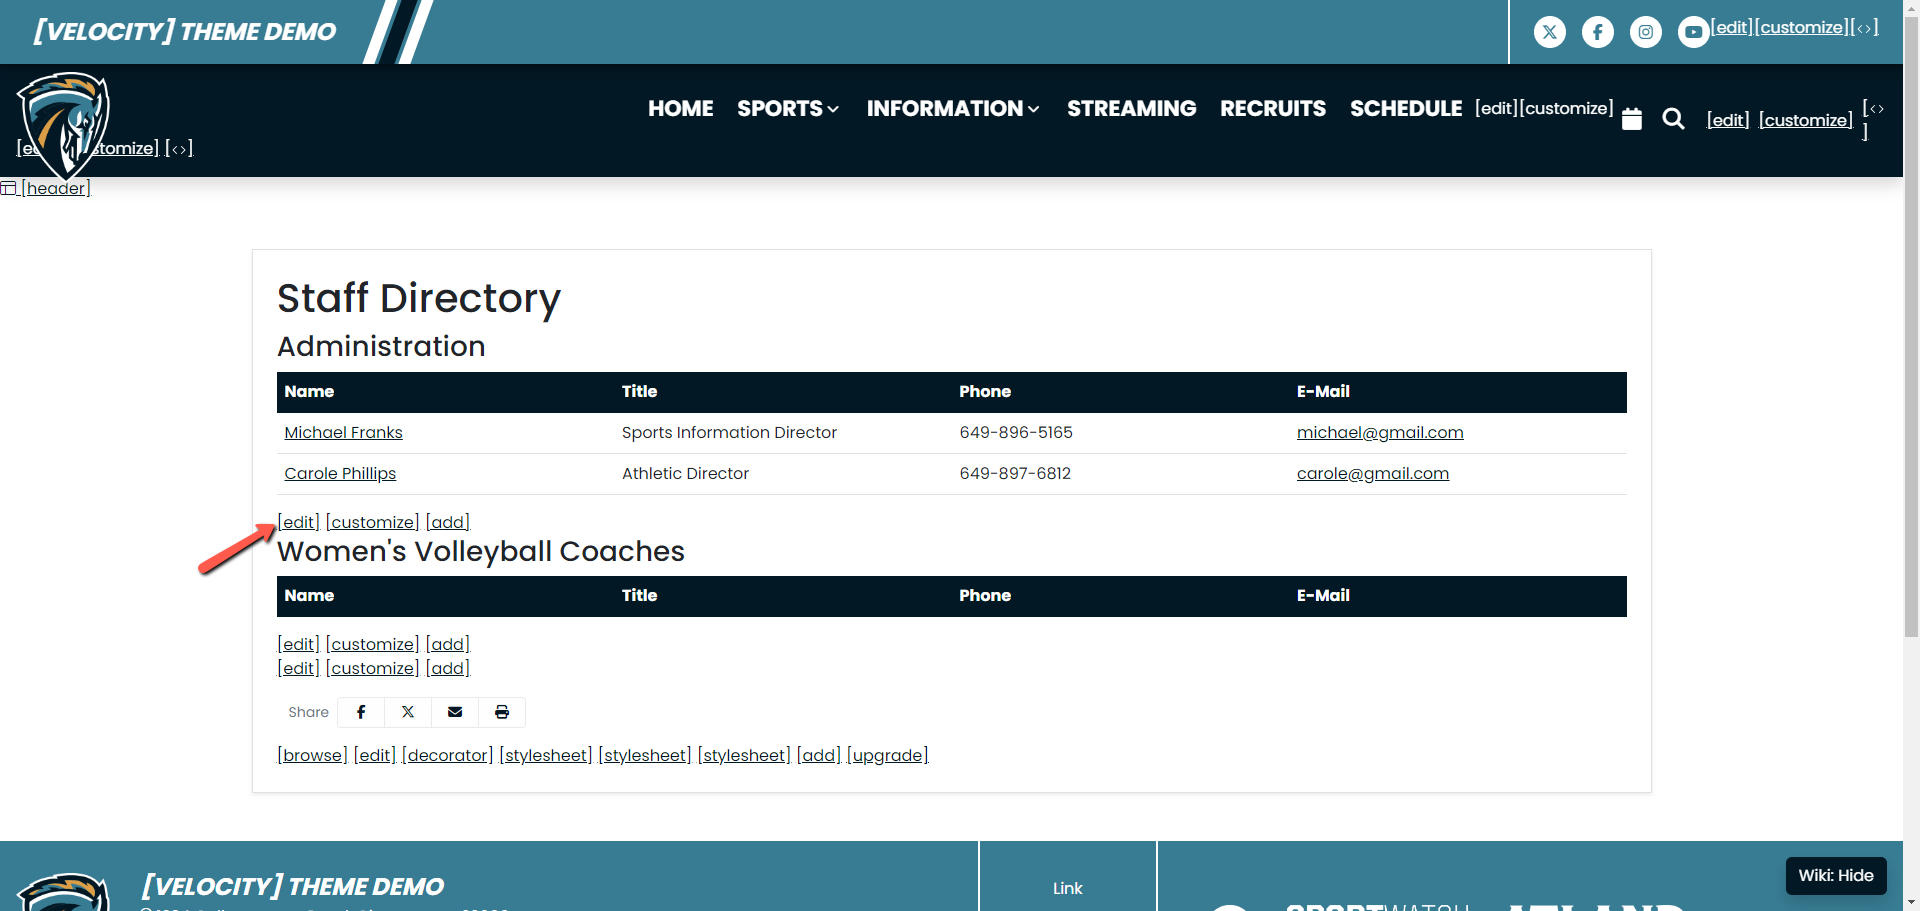
This setup is used for clients on Themes 2.0 that are using the Coaches tab in GameDay to manage their coaches pages, so they have a new coaches page for each sport and season. You will have to update each coaches section on the staff directory page every year to display the current year coaching staff. To do this you will need to know where your staff directory page is located within the Website tab. You can do that by viewing the staff directory page on the front end of the website and note the URL path after the first “/” in the URL. We setup the staff directory page under the /information/directory section and name it index when the site is first built, but some clients will move it to a different section or rename it to something else.
Login to the website and go to the Website tab
Navigate to the section where the staff directory page is located
Click edit content on the file powering the staff directory page
Check the box next to the old coaches page you want to remove
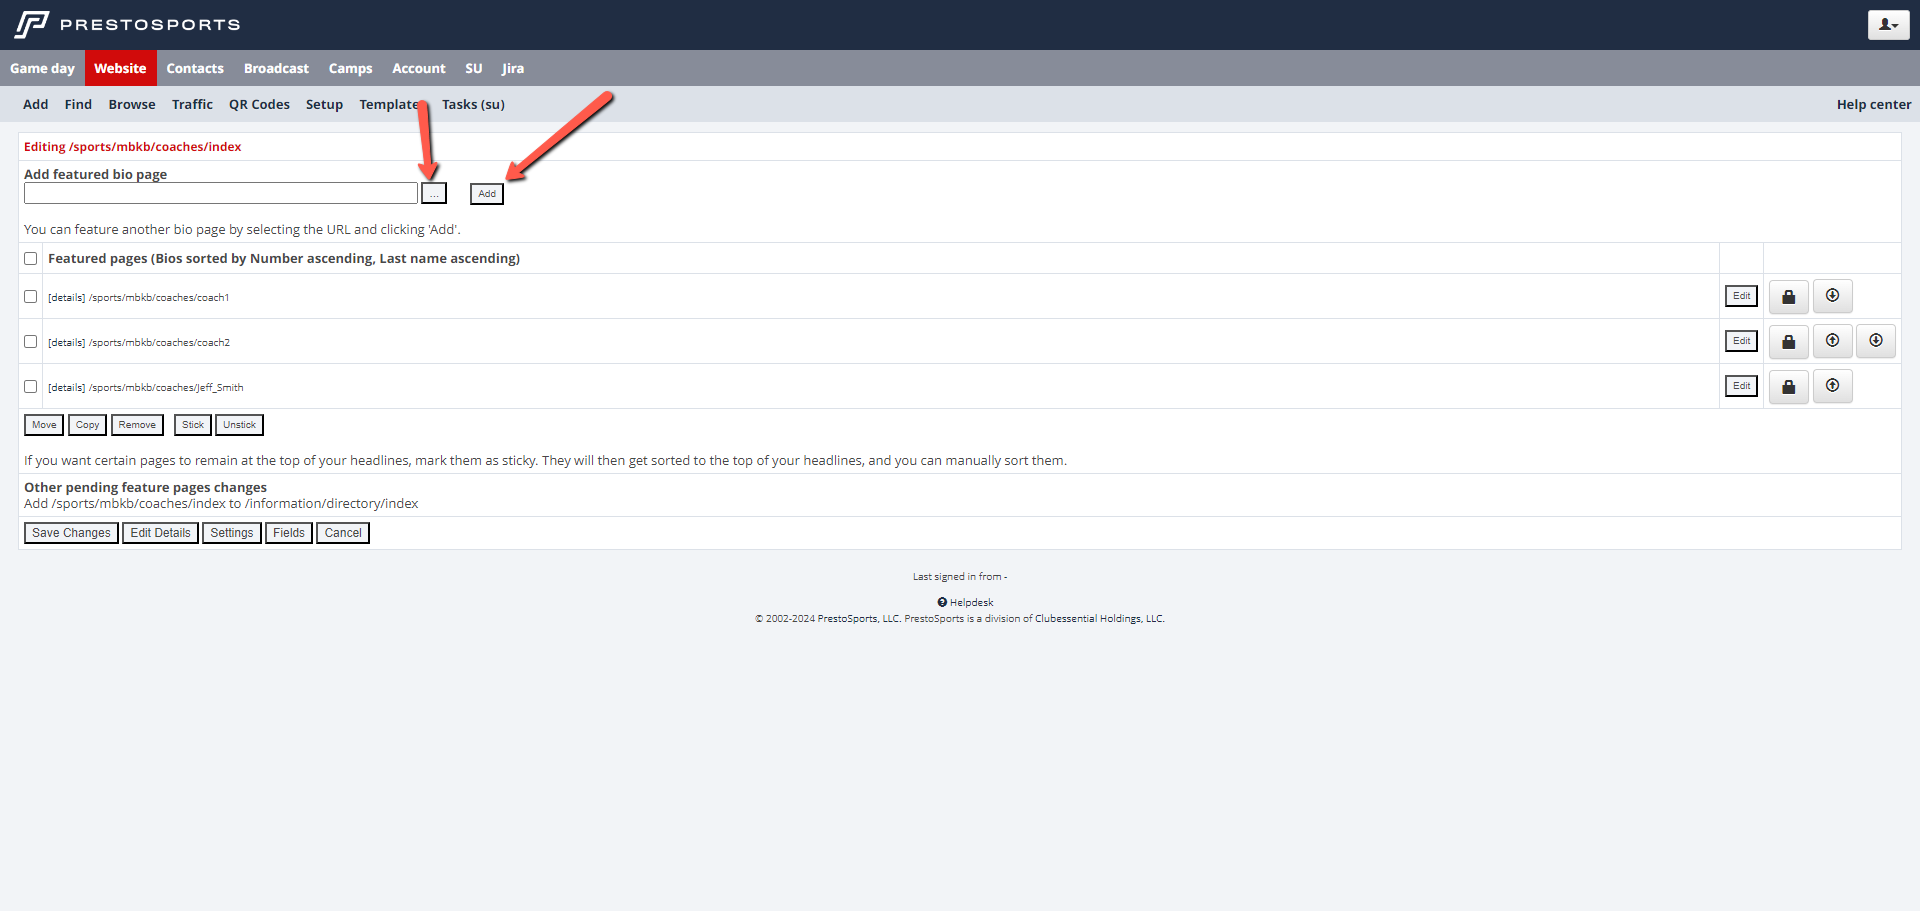
Click the file selector box next to the Add featured page field and select the new coaches page. That page can be found within the season section, within the sport section, with a filename of “coaches”. For example the women’s basketball coaches for the 2024-25 season would have this URL path- /sports/wbkb/2024-25/coaches
Click Add
Click on the pin icon on the right side of the coaches page listing to set the page to stick, so you can now drag the page in the correct spot on the page
Repeat Steps 4-7 to update additional page
Click Save Changes
Video instructions:
Changing coaches sections from old setup to Themes 2.0 setup
These instructions are used to change your coaches' section setup from the old setup where it was one file managed by sport, to the Themes 2.0 setup where there is a new coaches page for every season.
Changing links on navbar-secondary files
Login to the website and go to the Website tab
Click on the sports section and then the specific sports section you want to edit the file within (ex. bsb, fball, wsoc, etc.)
Click edit content on the navbar-secondary file. You can also access the navbar-secondary file by going to the GameDay tab, navigate to the current sports season, click on the Navbars tab, and click edit next to Navbar Secondary
In the Target URL field change the URL path to the one for the coaches page in the season, which will follow this format- /sports/sport/season/coaches. For example the women’s basketball coaches for the 2024-25 season would have this URL path- /sports/wbkb/2024-25/coaches
Click Save Changes
Repeat Steps 2-5 to update all of your navbar-secondary links for every sport
Video instructions:
Changing out coaches sections on the staff directory page
Login to the website and go to the Website tab
Navigate to the section where your staff directory page is housed. Normally this is within the information section, and then the directory section, but that section may have been renamed to something else on your website by yourself or a previous website admin. You can find out the section where the staff directory page is located by going to the staff directory page on the front end of the website and look for the first word after the domain name which will indicate which section the page is located in. The normal set up for the staff directory pages will show /information/directory/index in the URL path for that page. If it has a different name then you will need to go to that section to edit this file.
Click edit content on the file powering the staff directory page
Check the box next to each of the coaches sections that show URL paths like this- /sports/sport/coaches/index and then click Remove to remove those old sections
In Add featured page either input the URL path for each coaches section under the new format from the most current season- /sports/wbkb/2024-25/coaches or you can click the file selector box next to that field to select them from within that sports section. Click Add to add it to the page.
Repeat Step 5 to add all of your sports coaches sections to the staff directory page
Check the box next to Featured pages and then click Stick at the bottom of the page. You can now click and drag to adjust the order of the coaches sections on the staff directory page.
Click Save Changes
Video instructions:
Adding a new index file to your staff directory
This is used to create a new section on your staff directory for athletic trainers, athletic communications, strength & conditioning, etc. This page is normally located in a sub section named directory within the information section in the Website tab. You can determine if your staff directory page is located in a different section by going to the staff directory page on the front end of the website and check the URL path after the website domain name. The URL path is everything after the first “/” in the URL If it’s in the information section the URL path will look like this- /information/directory/index. If the page is located in a different section, then replace that section named information with the areas listed in items 1 and 2 and then proceed with the rest of the instructions.
Click on the information section
Click on the directory section
Click on “add here” located in the column on the right
From the “content type” drop down menu, select “Headlines”
Name the file according to the heading for the section. For example for an area for athletic trainers you could name the file athletic-trainers.
Put the section name in the Title field. For example Athletic Trainers, Athletic Communications, etc. and then click Continue
In the Pages allowed dropdown select Bios. The sorting area allows you to adjust the automatic sorting for that area, but you will normally set up that section to be manually sorted. Then click Save Settings.
Select the Fields that you want to display within the bios featured to that section.
If you have those staff member bios created you can click the gray box next to Add featured bio page to select those files to add to the section. If you haven’t created those bios you can create them by following the instructions for administrators bios at the top of this page.
Use the thumb tack icon on the right to pin your new bio and that allows you to sort the order in which they appear. You can also click the box next to Featured Pages to select all of the files and then click the button that says Stick.
Click Save Changes. To add/remove bios or to adjust the order of the bios in that area you will click edit content on the filename for that section.
Video instructions:
