Tournament Central and Championships Microsites
If you are interested in adding Tournament Central or Championships microsites to your website, please reach out to your assigned Client Success Manager for more information on adding that to your contract. If you don’t know who that person is, you can get their contact information from the Resource Center or you can contact our Support team here.
These instructions for updating Tournament Central and Championships microsites refer to websites on our Themes 2.0 platform. You can check to see if your website is on that platform by reviewing your contract or by logging into your website, click on the Website tab, click on the Setup subtab, click Site profile, and check under Features to see if it says Theme 2.0 with a theme name next to it. If there is a name next to it that means your website is on Themes 2.0. If you don’t see that text that means your site is not on our Themes 2.0 platform.

Creating New Microsites
Go to the Website tab
Navigate to the section where your microsites are housed. Typically this section will be named tournament or championships. You can check for that on your site by going to an existing microsite page and look at the first part of the URL path after the domain name here:

For this site these microsites are located within the tournament section.
Once you have located where the microsites are stored, navigate to that section in the root directory and click on it
These microsites are organized by season and then also by sport. If you are creating a new microsite for a sport in an existing season, click on that season section (ex. 2023-24), then add a section for the sport. For example, if you are adding a microsite for baseball name the section- bsb so that it aligns with the section name in the sports section of the site.
If you are wanting to create microsites for a new season, then create a new season section within the section that houses the microsites. Create the section with the new season years in it (ex. 2024-25). Then you can click on that section to create the sections for each sport.
Once you have created the new section(s) go back to the previous season and sport section for the one that you are creating a new microsite for.
You will need to copy a set of files from that previous section into the new one. The files that need copied can vary from site to site depending if you were previously using all of the components available on these pages. From the list below you will only need to copy the files you see in your previous section:
championship-contacts
championship-info
championship-links
countdown-composite
composite
headlines-featured
headlines-more-news
headlines-parallax
hero-banner
index
members-logos
navbar-banner
navbar-championship-teams
navbar-global
navbar-header-btn-link
navbar-header-links
navbar-scoreboard
navbar-social
navbar-sponsorsAfter you have copied these files into the new section, navigate to that section and create a section named images. This is where you will upload images and logos that you are using in the microsite.
If your microsite is using the Teams component, you will also need to create a section named teams. This is where you will create the team profiles to connect to that component.
Now that you have all of the files created for the new microsite, now it’s time to connect content to them. Here’s instructions for each component available on the microsite:
Updating Components Within The Microsite
Hero Banner
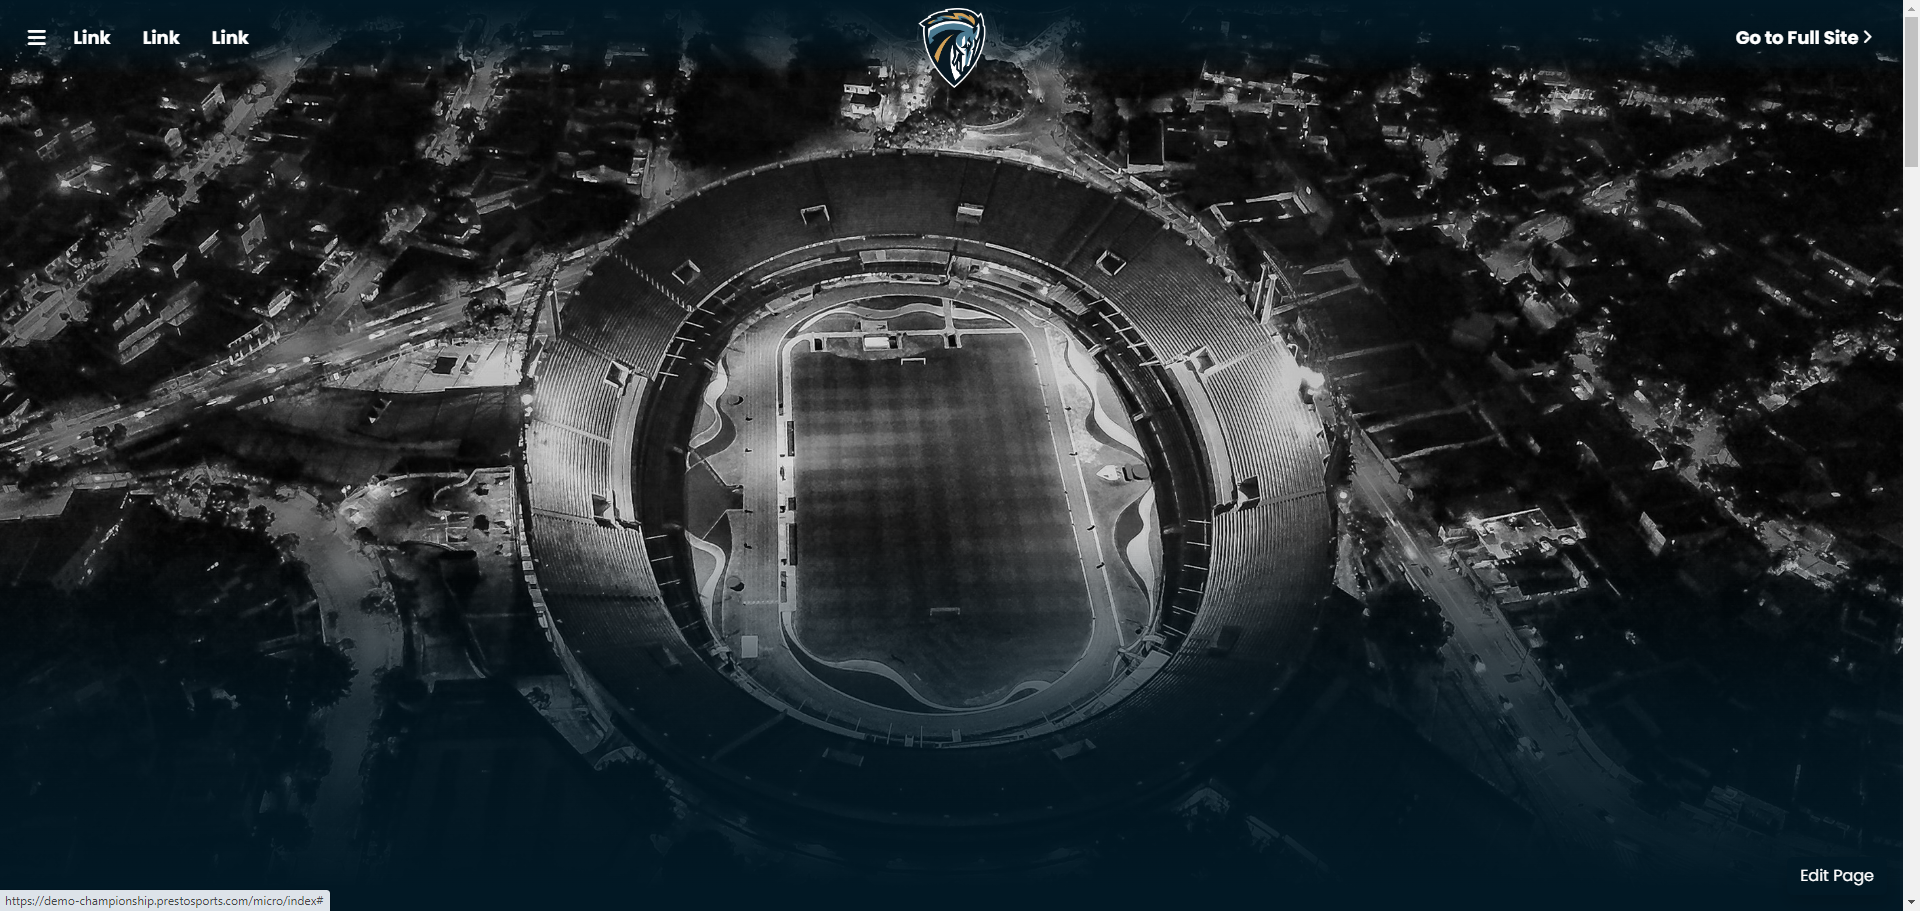
The Hero Banner component is the large image that displays at the top of the page. Here are instructions for updating that image:
Navigate to the section for the microsite and click on the images section. Click on the banner section. If a section like that doesn’t exist, create it and then click on it. Upload the new image into that section. This image needs to be sized to 1920 px by 1080 px or larger.
Navigate back to the section with the microsite and click edit content on the file named hero-banner
Click the file selector box next to the Image URL field to select the new image you uploaded from the /images/banner section within the microsite section.
You can connect a URL to the image in the Target URL field. For external URLs copy/paste them into that field. If you want to connect an internal page click the file selector box next to that field and select the page from the section it’s stored in within the website.
Enter a description of the image in the Link alt text field
Click Save Changes
Video instructions:
Next Event

The Next Event component displays the next upcoming event for the tournament or championship. Here are instructions for updating that component:
Using Existing Schedule- Follow these instructions if you are utilizing an existing schedule within the website to connect to this component
Navigate to the section where the microsite is stored
Click edit content on the file named composite
Click the file selector box next to the Add schedule field, select the schedule file you want to connect, and then click Add schedule
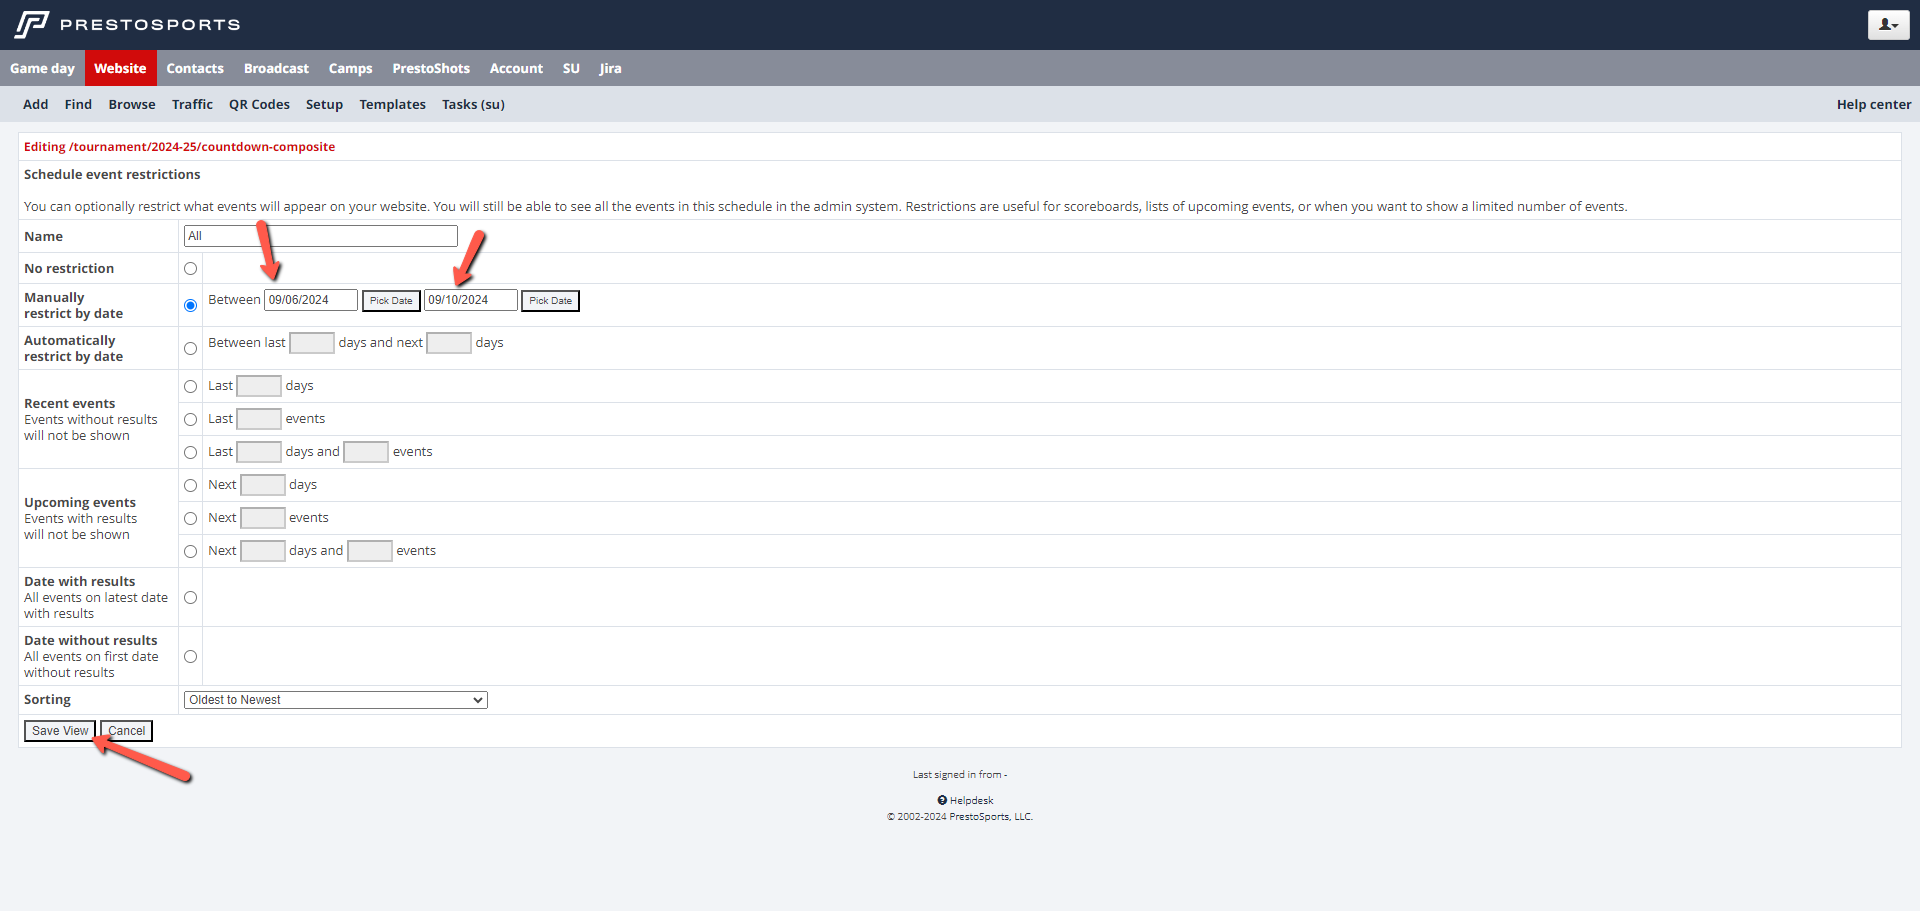
If the schedule also has events outside of the tournament or championship you can filter those out by clicking Edit on View 0, change the restriction on the schedule to Manually restrict by date, enter the dates for the events in the date picker, click Save View, and then click Save Changes
If the schedule only has events for the tournament or championship you can just click Save Changes after you connect the schedule

Creating a New Schedule- Follow these instructions to create a new schedule to connect to this component
Manual sports (cross country, track & field, etc.)
Navigate to the section where the microsite is stored
Click [add here] on the right under Options
From the "Content-type" drop-down menu, select schedule: manual
Name this file schedule
Give the schedule a Title (this text will display at the top of the schedule page)
Note: Schedules do not need Date or Lead-inClick "Continue"
Select the button next to One or multiple teams, flexible results
Click "Continue"
In the Sport field, enter in the sport
Click "Save settings"
Click the add event button or click import CSV to import events
Complete the event information (NOTE: you only need to use the top "Team name" and "Result" fields and you will add only the opponent's name or event name in that field)
Click Save
Repeat steps #15-17 until all events have been added
Click Save Changes
To edit events in the schedule click edit content on that file you created
Network schedule (baseball, basketball, volleyball, etc.)
Navigate to the section where the microsite is stored
Click [add here] on the right under Options
From the "Content type" drop down menu, select schedule: network
Name this file schedule
Give the schedule a Title (this will appear at the top of the schedule page)
Note: Schedules do not need Date or Lead-inClick "Continue"
From the "Sport" drop down menu, select the appropriate sport
From the "Season" drop down menu, select the appropriate season
Click "Save season"
From the "Teams" drop down menu, select the appropriate teams. This will show teams that you have RPI access to.
Click the Add team button. You can also click Add all teams to select all teams you have access to for that sport season
Click "Save teams"
On the schedule event restrictions page adjust the restrictions to display the games that should display on this schedule page. You will need to use the Manually restrict by date option so you can pick the dates for the tournament. If you want all games for all teams in that sport season to display on the schedule page, leave the button checked for No restriction and click Save Restrictions
Click "Save" to finish creating the schedule
Connecting the schedule to the Next Event component
Navigate to the section where the microsite is stored
Click edit content on the file named composite
Click the file selector box next to the Add schedule field, select the schedule file you want to connect, and then click Add schedule
If the schedule also has events outside of the tournament or championship you can filter those out by clicking Edit on View 0, change the restriction on the schedule to Manually restrict by date, enter the dates for the events in the date picker, click Save View, and then click Save Changes
Video instructions:
Parallax
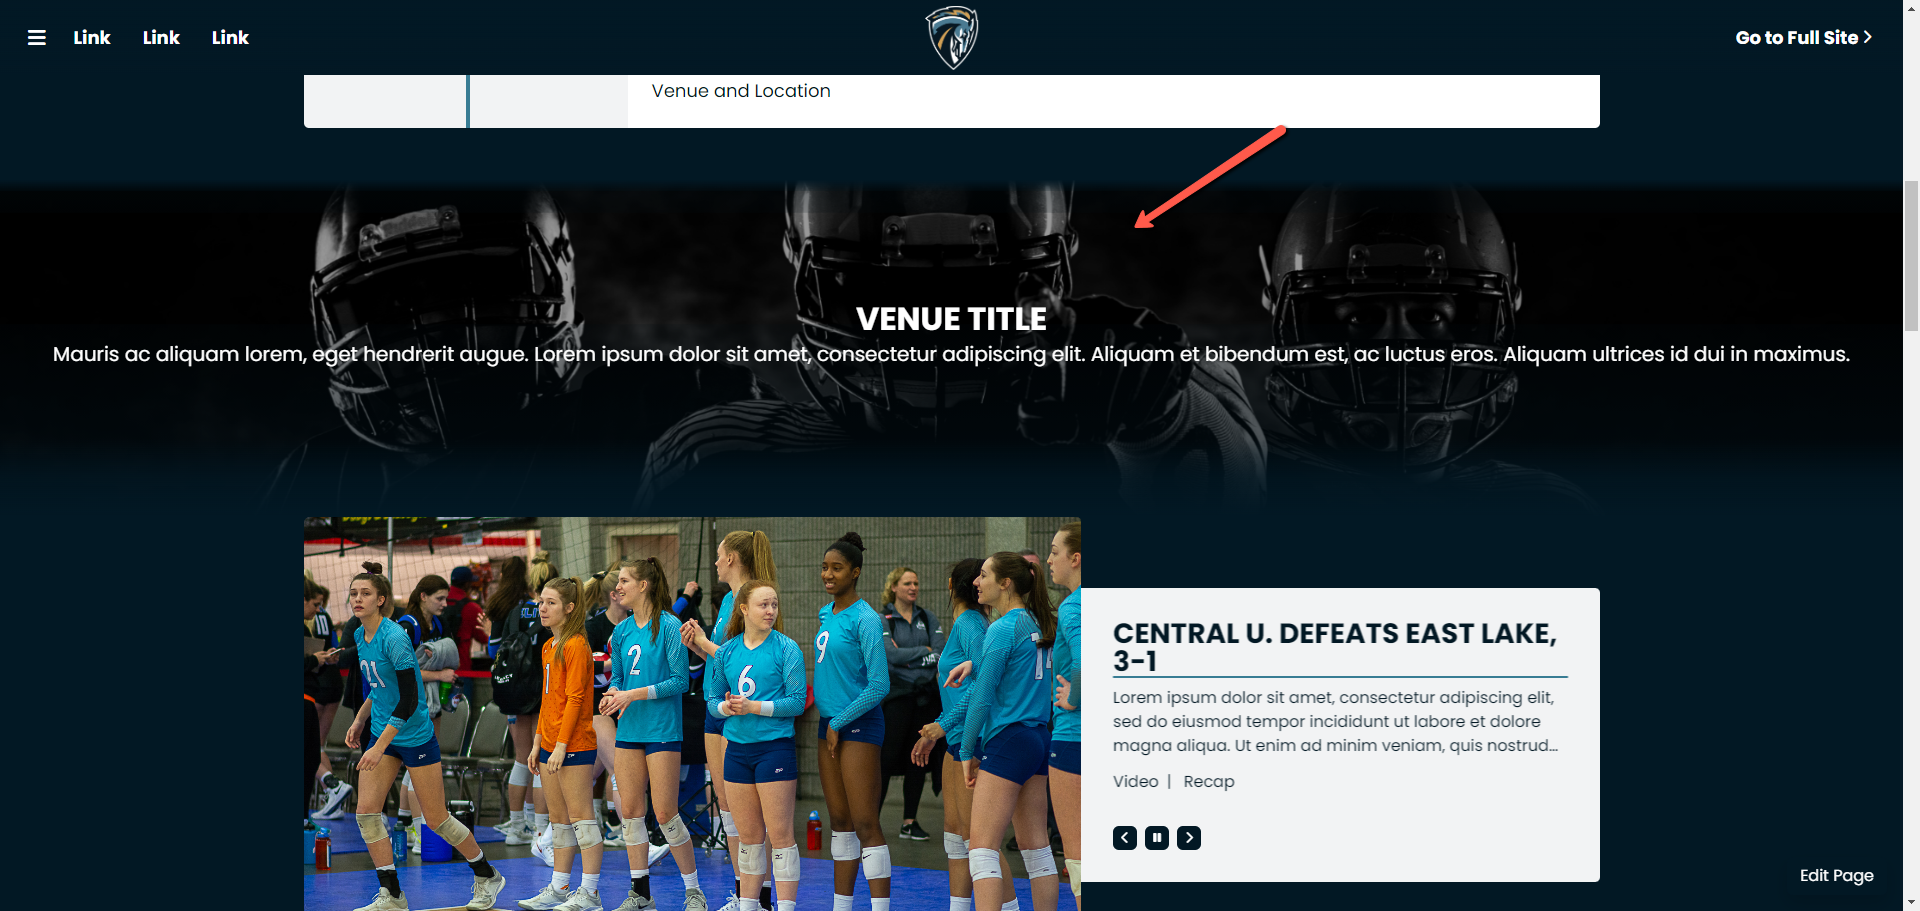
The Parallax component displays an image that scrolls through as the user goes up and down the page. It also can display text as well. Here are instructions for updating this component:
Navigate to the section for the microsite and click on the images section
Create a section named parallax if one doesn’t exist. Click on that section and upload the new image in it. This image needs to be sized to 1920 px by 1080 px.
Navigate back to the section for the microsite
Click edit content on the file named headlines-parallax
This component can only display one image at a time, so you will need to remove the image connected to this file if there is one. Check the box next to the file connected to it and click Remove
Click the file selector box next to the Add featured page field to select the new image you uploaded from the /images/parallax section in the microsite section and then click Add
If you want to add text in front of the image click Edit Details. The large text from the above screenshot pulls from the Title field. The smaller text pulls from the Lead-in field
Once the image is connected and the text has been entered click Save Changes
Video instructions:
News Rotator

The News Rotator component is used to display releases related to the tournament/championship. Here are instructions for updating this component:
Navigate to the section where the microsite is housed
Create a section named releases and then click on it to go into that section
Upload the thumbnail image for the release in this section. This image needs to be sized to 1920 px by 1080 px.
Once the image has been uploaded, click add here on the right side of the page, select article: rich as the content type, and click Continue
The Name field can be used to show the release title or you can use a different naming convention for it. If you are entering the release title, each word should be separated with a hyphen and should be lowercase. (Ex. smith-scores-25-points-to-seal-championship-for-raiders) You could also use a naming convention such as release-#, update-#, etc.
Enter the date in the Page Date field. This is used to sort releases within the component in chronological order
Enter the release title in the Title field
If you want a lead-in to show for the release, enter that in the Lead-in field
Click the file selector box next to the Thumbnail field to select the image you uploaded
In the Featured in headlines field, select the file named headlines-featured within the section that houses the microsite. So if your microsite is in a section named tournament, and within subsections 2023-24 and mbkb, then the filename would look like this- /tournament/2023-24/mbkb/headlines-featured
Click Continue
Enter the text for the release in the text editor
Click Save Changes
Repeat Steps 3-13 to add additional releases
Video instructions:
Scoreboard

The Scoreboard component is used to display both upcoming events and past results. Here are instructions for updating this component:
Using Existing Schedule- Follow these instructions if you are utilizing an existing schedule within the website to connect to this component
Navigate to the section where the microsite is stored
Click edit content on the file named composite
Click the file selector box next to the Add schedule field, select the schedule file you want to connect, and then click Add schedule
To adjust the restrictions for the number of events that display within the component, click edit next to view 1 for upcoming events or view 2 for past results, adjust the restrictions, click Save View, and then click Save Changes.

Video instructions:
Creating a New Schedule- Follow these instructions to create a new schedule to connect to this component
Manual sports (cross country, track & field, etc.)
Navigate to the section where the microsite is stored
Click [add here] on the right under Options
From the "Content-type" drop-down menu, select schedule: manual
Name this file schedule
Give the schedule a Title (this text will display at the top of the schedule page)
Note: Schedules do not need Date or Lead-inClick "Continue"
Select the button next to One or multiple teams, flexible results
Click "Continue"
In the Sport field, enter in the sport
Click "Save settings"
Click the add event button or click import CSV to import events
Complete the event information (NOTE: you only need to use the top "Team name" and "Result" fields and you will add only the opponent's name or event name in that field)
Click Save
Repeat steps #15-17 until all events have been added
Click Save Changes
To edit events in the schedule click edit content on that file you created
Network schedule (baseball, basketball, volleyball, etc.)
Navigate to the section where the microsite is stored
Click [add here] on the right under Options
From the "Content type" drop down menu, select schedule: network
Name this file schedule
Give the schedule a Title (this will appear at the top of the schedule page)
Note: Schedules do not need Date or Lead-inClick "Continue"
From the "Sport" drop down menu, select the appropriate sport
From the "Season" drop down menu, select the appropriate season
Click "Save season"
From the "Teams" drop down menu, select the appropriate teams. This will show teams that you have RPI access to.
Click the Add team button. You can also click Add all teams to select all teams you have access to for that sport season
Click "Save teams"
On the schedule event restrictions page adjust the restrictions to display the games that should display on this schedule page. You will need to use the Manually restrict by date option so you can pick the dates for the tournament. If you want all games for all teams in that sport season to display on the schedule page, leave the button checked for No restriction and click Save Restrictions
Click "Save" to finish creating the schedule
Video instructions:
Connecting the schedule to the Scoreboard component
Navigate to the section where the microsite is stored
Click edit content on the file named composite
Click the file selector box next to the Add schedule field, select the schedule file you want to connect, and then click Add schedule
To adjust the restrictions for the number of events that display within the component, click edit next to view 1 for upcoming events or view 2 for past results, adjust the restrictions, click Save View, and then click Save Changes
Banner
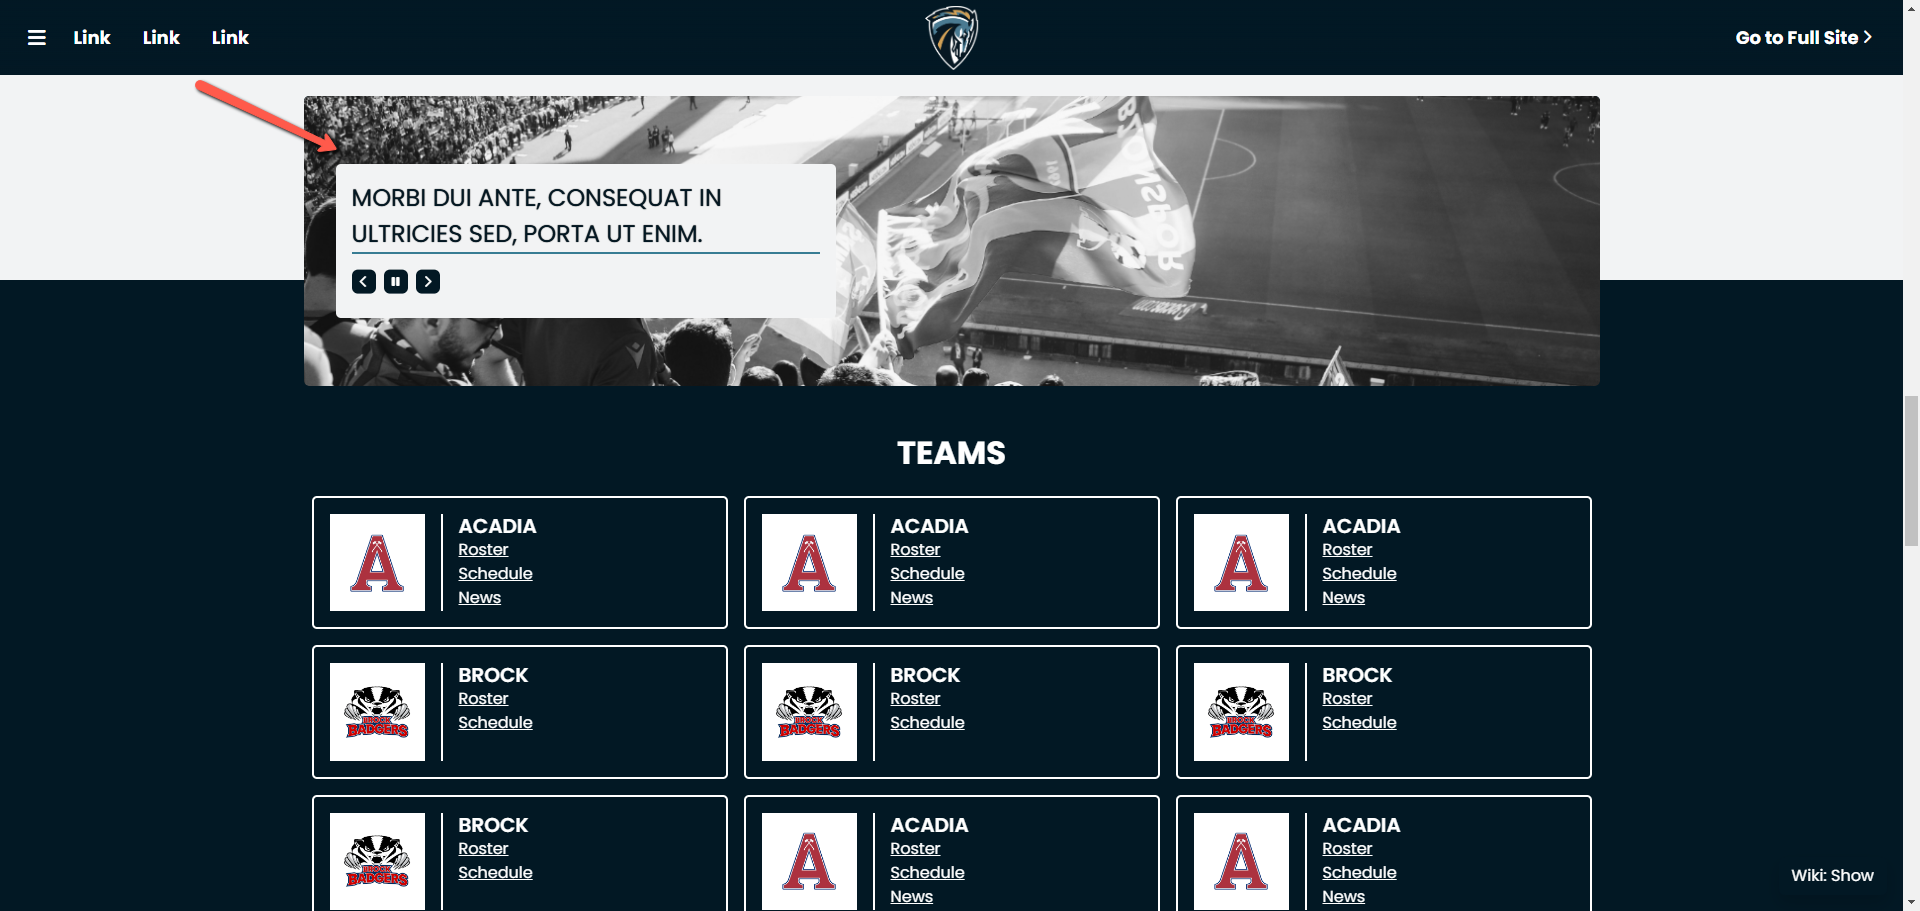
The Banner component is used to display graphics with information related to the event. These graphics can be connected to external URLs or internal pages from the website. Here are instructions for updating this component:
Navigate to the section where the microsite site is stored and click on the images section
Click on the banner section. If a section like that doesn’t exist, create it and then click on it. Upload the new graphics into that section. Those graphics needs to be sized to 1311 px by 293 px.
Navigate back to the microsite section
Click edit content on the file named navbar-banner
Click the file selector box next to Image URL field for the banner you want to replace and select the new banner for that space from the /images/banner section within the microsite section
In the Target URL field, copy/paste an external URL or click the file selector box next to it to select an internal page to link to that graphic
Enter text in the alt text field describing the banner. This text will also display over top of the banner graphic
Repeat this process to replace additional banners or click Add to add more banner spaces
Click and drag to adjust the order of the banners
Click Save Changes
Video instructions:
Team Information
The Team Information component is used to showcase team logos as well as links to more information about each team, such as roster, schedule, news, etc. Here are instructions for updating this component:
Navigate to the section where the microsite is housed
Click on the images section and then the section named logos. If a section like that doesn’t exist, create one and then click on it. Upload all the logos for teams for this component. These logos need to be sized to 256 px by 256 px.
Navigate back to the microsite section
Click on the teams section
Click add here on the right side of the page, select Team info: manual as the content type, and then click Continue
Enter the team name in the Name field in lowercase letters
In the Featured in headlines field click in that field and find the file named “index” within the teams section of the microsite you are working on. Click on that filename and then click Add
Click Continue
Enter the team name in the School name field. This is where you can add a seed number or ranking number ahead of the team name to display within the component.
Click on the file selector box next to Logo to select the team’s logo from the /images/logos section in the microsite section
Add the links you want to connect for that team in the custom fields in the Custom area. The following fields are used for these specific page links:
Custom 1- Roster
Custom 2- Schedule
Custom 3- News
Those fields are preset like that and cannot be changed to display different text.Click Save Changes
Repeat steps 5-12 to add additional teams
To adjust the teams so you can manually sort them click edit content on the file named “index” within the team section, select all the teams by checking the box next to their filename, and then click Stick. You can now click and drag to adjust the order of the teams.
Video instructions:
Team Logos

The Team Logos component is used to display logos for teams participating in the event. If you are also using the Team Information component you can use the same logos you uploaded for that component for this one and start with Step 3. If you aren’t using that component, then you will need to upload those logos. Here are instructions for updating this component:
Navigate to the section where the microsite is housed
Click on the images section and then the section named logos. If a section like that doesn’t exist, create one and then click on it. Upload all the logos for teams for this component. These logos need to be sized to 256 px by 256 px.
Navigate back to the microsite section
Click edit content on the file named “members-logos”
To replace a logo click the file selector box next to the Image URL field and select the logo from the /images/logos section within the microsite section
Copy/paste the team’s website in the Target URL field
Add the team name in the alt text field
To add additional logo spaces click the Add button and follow Steps 5-7 to add more logos
Click and drag to adjust the order of the logos within the component
Click Save Changes
Video instructions:
Recent News

The Recent News component is used to display additional releases related to the tournament/championship that aren’t displaying within the News Rotator. This can also be used to display releases that you want to display throughout the length of the event. Here are instructions for updating this component:
Creating new releases for this component
Navigate to the section where the microsite is housed
Create a section named releases and then click on it to go into that section
Upload the thumbnail image for the release in this section. This image needs to be sized to 1920 px by 1080 px.
Once the image has been uploaded click add here on the right side of the page, select article: rich as the content type, and click Continue
The Name field can be used to show the release title or you can use a different naming convention for it. If you are entering the release title each word should be separated with a hyphen and should be lowercase. (Ex. smith-scores-25-points-to-seal-championship-for-raiders) You could also use a naming convention such as release-#, update-#, etc.
Enter the date in the Page Date field. This is used to sort releases within the component in chronological order
Enter the release title in the Title field
If you want a lead-in to show for the release enter that in the Lead-in field
Click the file selector box next to the Thumbnail field to select the image you uploaded
In the Featured in headlines field, select the file named headlines-more-news within the section that houses the microsite. So if your microsite is in a section named tournament, and within subsections 2023-24 and mbkb, then the filename would look like this- /tournament/2023-24/mbkb/headlines-more-news
Click Continue
Enter the text for the release in the text editor
Click Save Changes
Repeat Steps 3-13 to add additional releases
Video instructions:
Removing a release from the News Rotator component and adding it to this component
Navigate to the section where the microsite is housed
Click on the releases section
Click edit details on the release you want to move from the News Rotator component to the Recent News component
Go to the Featured in headlines area and click Remove next to the headlines-featured file the release is connected to
In the Featured in headlines field, select the file named headlines-more-news within the section that houses the microsite. So if your microsite is in a section named tournament, and within subsections 2023-24 and mbkb, then the filename would look like this- /tournament/2023-24/mbkb/headlines-more-news
Click Save Changes
Video instructions:
Sponsors
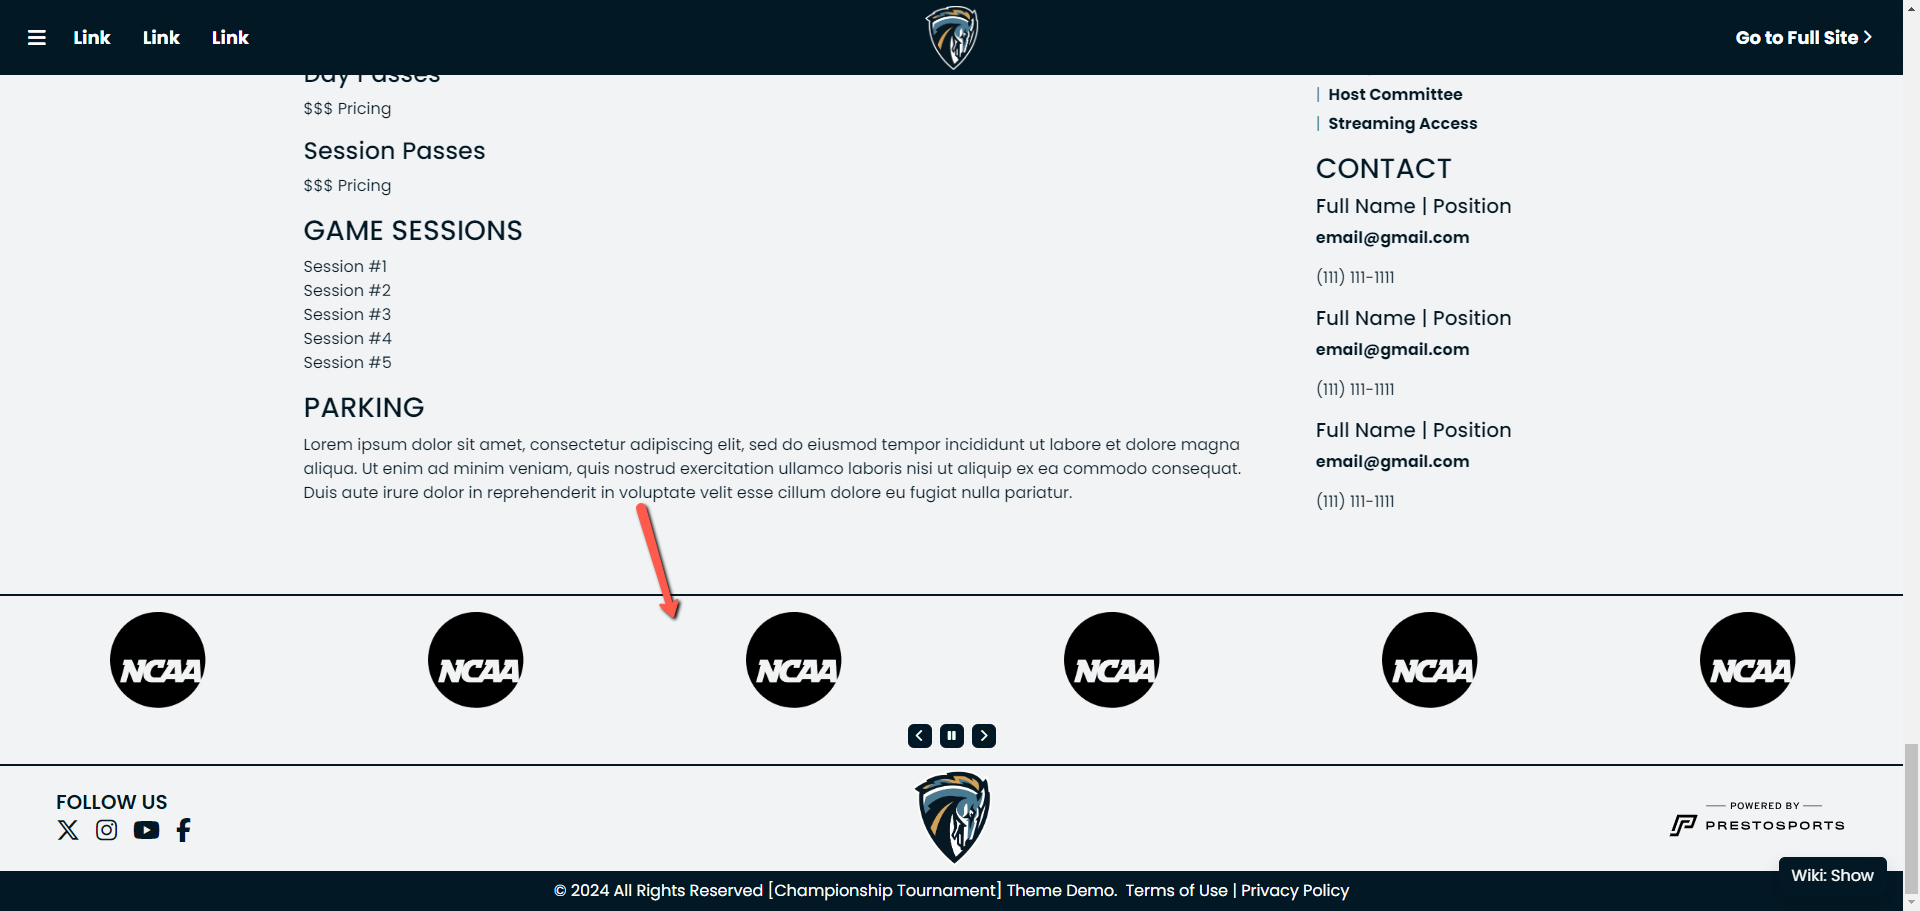
The Sponsors component is used to display logos for companies sponsoring the tournament/championship. This component can also be used to display logos for organizations that are hosting the event. Here are instructions for updating this component:
Navigate to the section where the microsite is housed
Click on the images section and then the section named logos. If a section like that doesn’t exist, create one and then click on it. Upload all the logos for teams for this component. These logos need to be sized to 256 px by 256 px.
Navigate back to the microsite section
Click edit content on the file named “navbar-sponsors”
To replace a logo click the file selector box next to the Image URL field and select the logo from the /images/logos section within the microsite section
Copy/paste the sponsors' website link in the Target URL field
Add the sponsor’s name in the alt text field
To add additional logo spaces click the Add button and follow Steps 5-7 to add more logos
Click and drag to adjust the order of the logos within the component
Click Save Changes
Video instructions:
Updating Navbars and Other Areas
Global Navbar
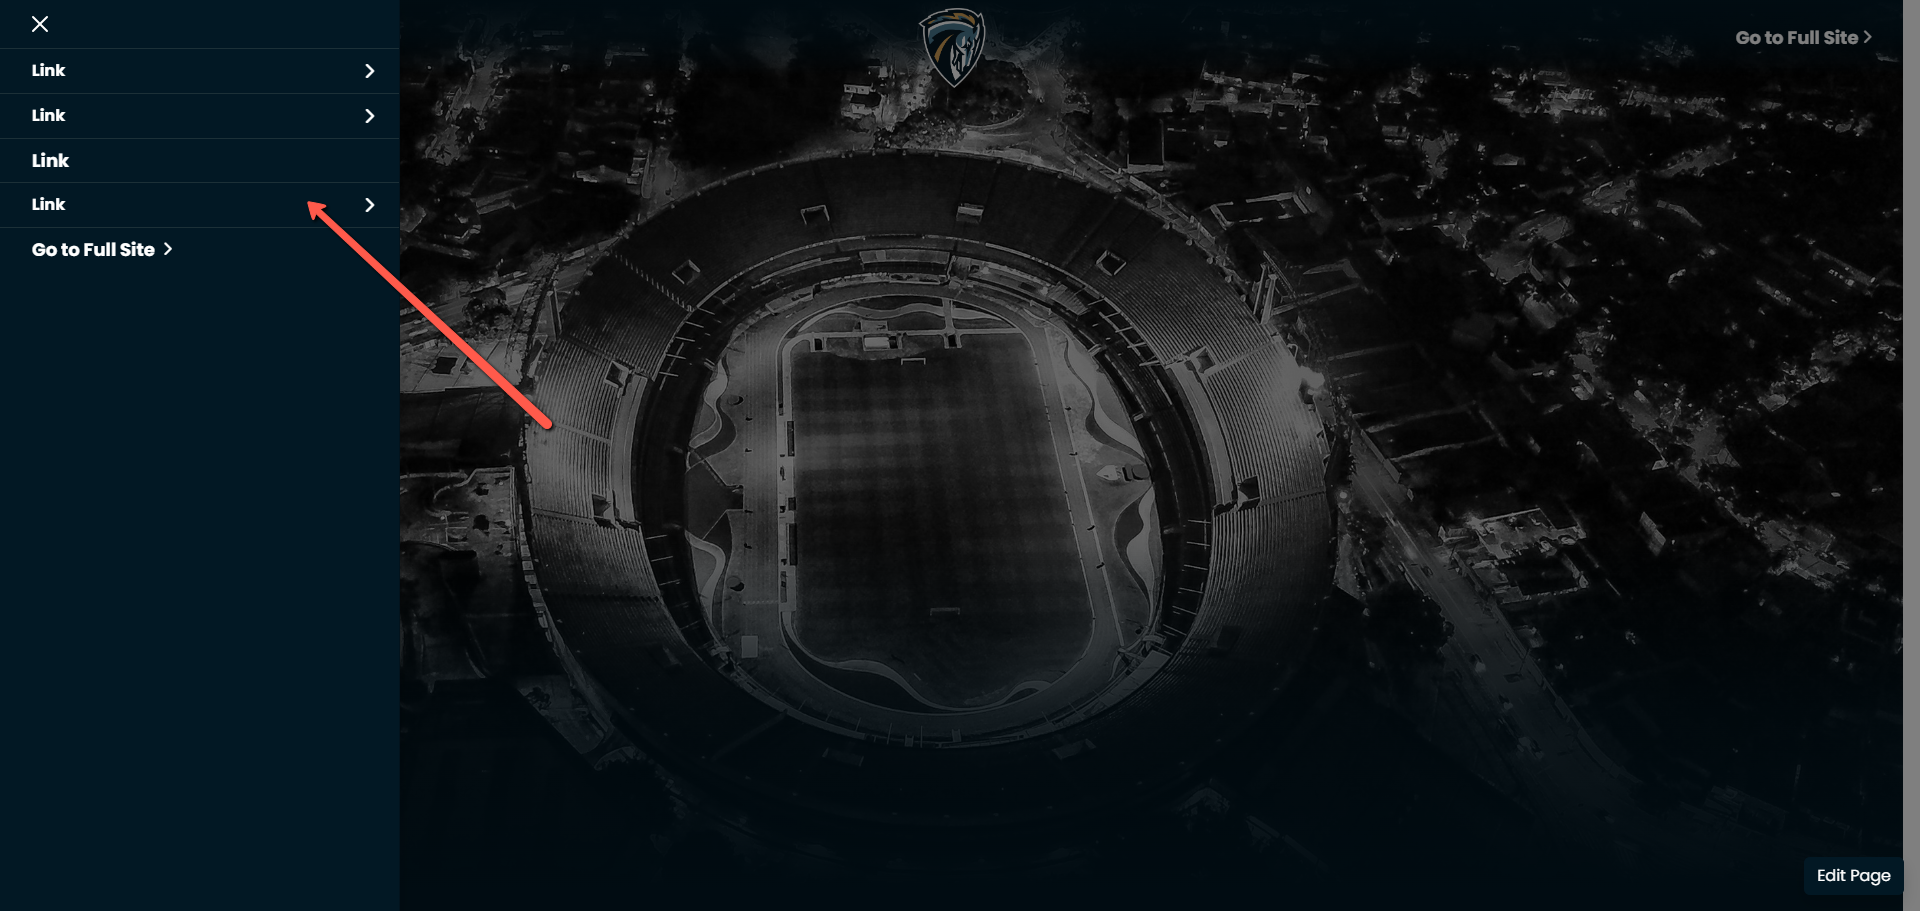
The global navbar is the navigation menu accessible from the top of the page by clicking on the menu icon in the upper left hand corner. It will open a menu as shown in the screenshot above. This is used to display links related to the tournament/championship. Here are instructions for updating this navbar:
Navigate to the section where the microsite is housed
Click edit content on the file named navbar-global
Enter the text you want to show for the menu items in the Label field (Ex. Tickets, Schedule, Sponsors, etc.)
To connect an external URL to the menu item, copy/paste the URL in the Target URL field
To connect an internal page from the website, click the file selector box next to the Target URL field and select the page from the section it is located within the website
Click Add to add additional menu items
Click and drag to adjust the order of the menu items
Click Save Changes to finalize the navbar adjustments
Video instructions:
If you want to display a dropdown menu to the side of a menu item, you will need to create an additional navbar for each menu item. Here are instructions for creating those dropdown menus:
Navigate to the section where the microsite is housed
Click add here on the right side of the page, select Nav bar: text as the content type, and click Continue
In the Name field enter a name for the file. This should start with the word navbar, followed by a hyphen, and then another word describing the navbar. (Ex. navbar-information, navbar-fans, etc.)
Click Add to add additional menu items
Enter the text you want to show for the menu items in the Label field (Ex. Tickets, Schedule, Sponsors, etc.)
To connect an external URL to the menu item copy/paste the URL in the Target URL field
To connect an internal page from the website, click the file selector box next to the Target URL field and select the page from the section it is located within the website
Click and drag to adjust the order of the menu items
Click Save Changes
Click edit content on the file named navbar-global
Click Show Secondary URL at the bottom of the page
Put a “#” in the Target URL field for the menu item you are connecting a dropdown menu to
Click the gray box next to the Secondary URL field to select the navbar file you created from within the section where the microsite is housed
Repeat Steps 12-13 to connect additional dropdown menus to other menu items
Click Save Changes to finalize the navbar adjustments
Header Links
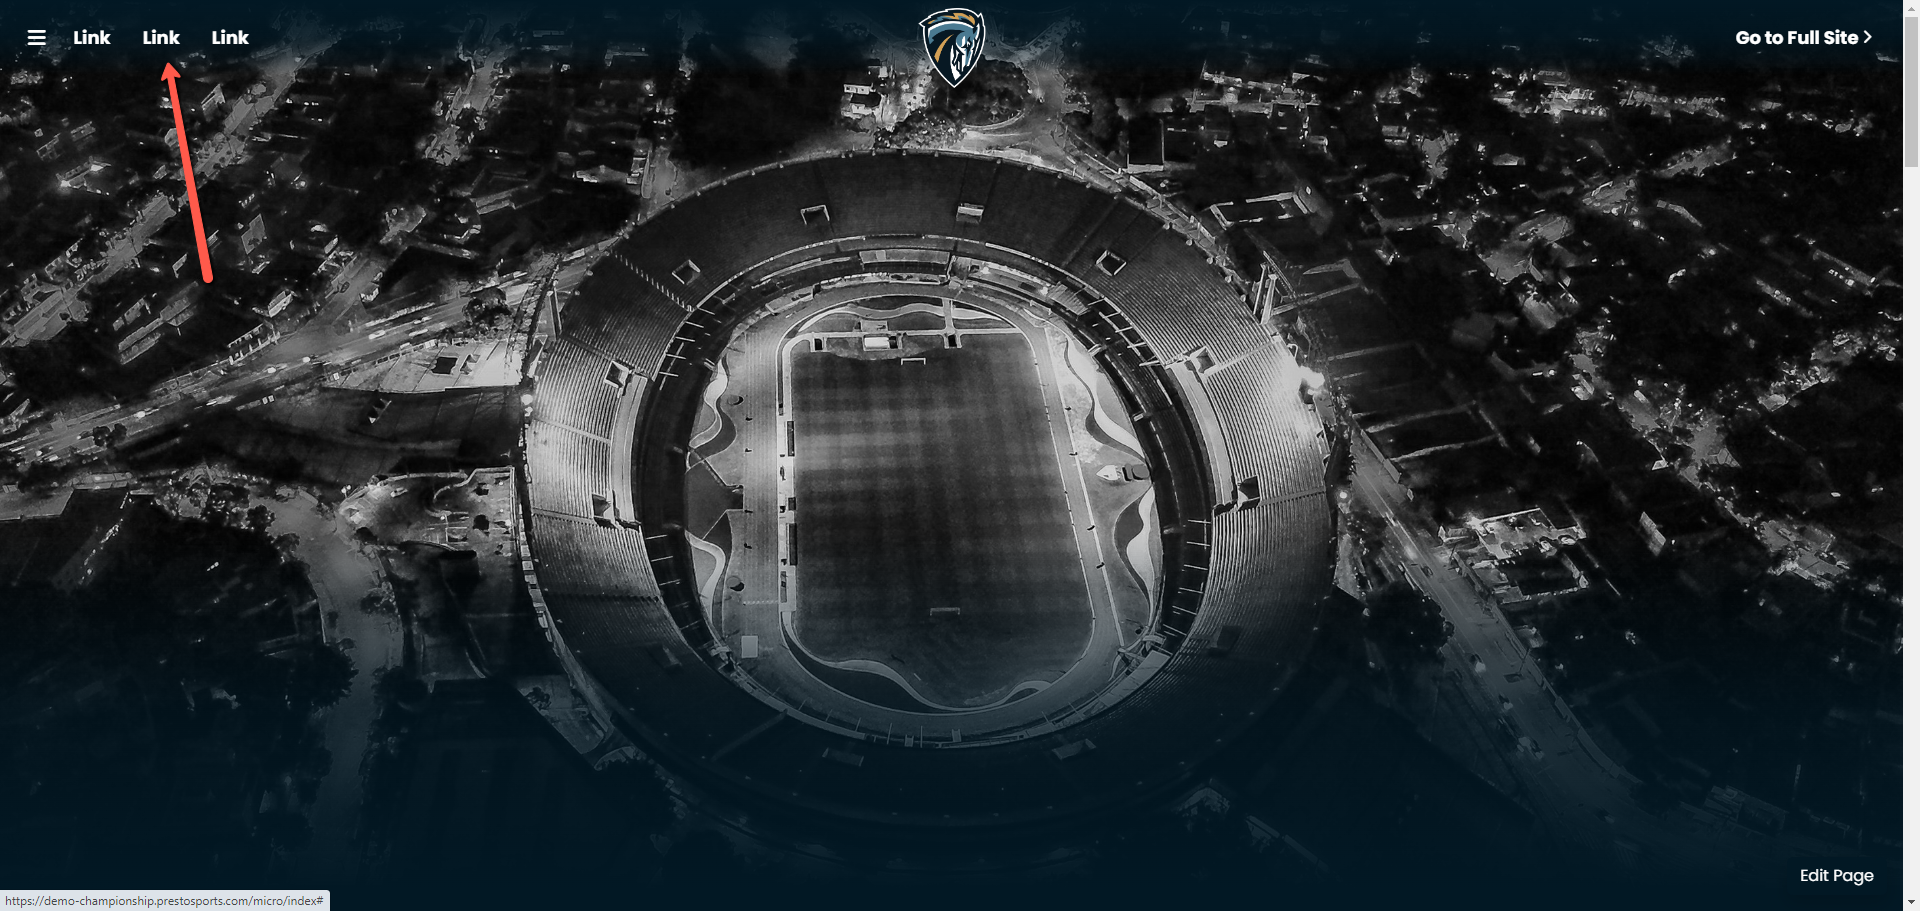
The header links area is used to display links that you want visitors to the microsite to have quick and easy access to. Here are instructions for updating those links:
Navigate to the section where the microsite is housed
Click edit content on the file named navbar-header-links
Enter the text you want to show for the menu item in the Label field (Ex. Tickets, Schedule, Sponsors, etc.)
To connect an external URL to the menu item, copy/paste the URL in the Target URL field
To connect an internal page from the website, click the file selector box next to the Target URL field and select the page from the section it is located within the website
Click Add to add additional menu items
Click and drag to adjust the order of the menu items
Click Save Changes to finalize the navbar adjustments
Video instructions:
Header Button
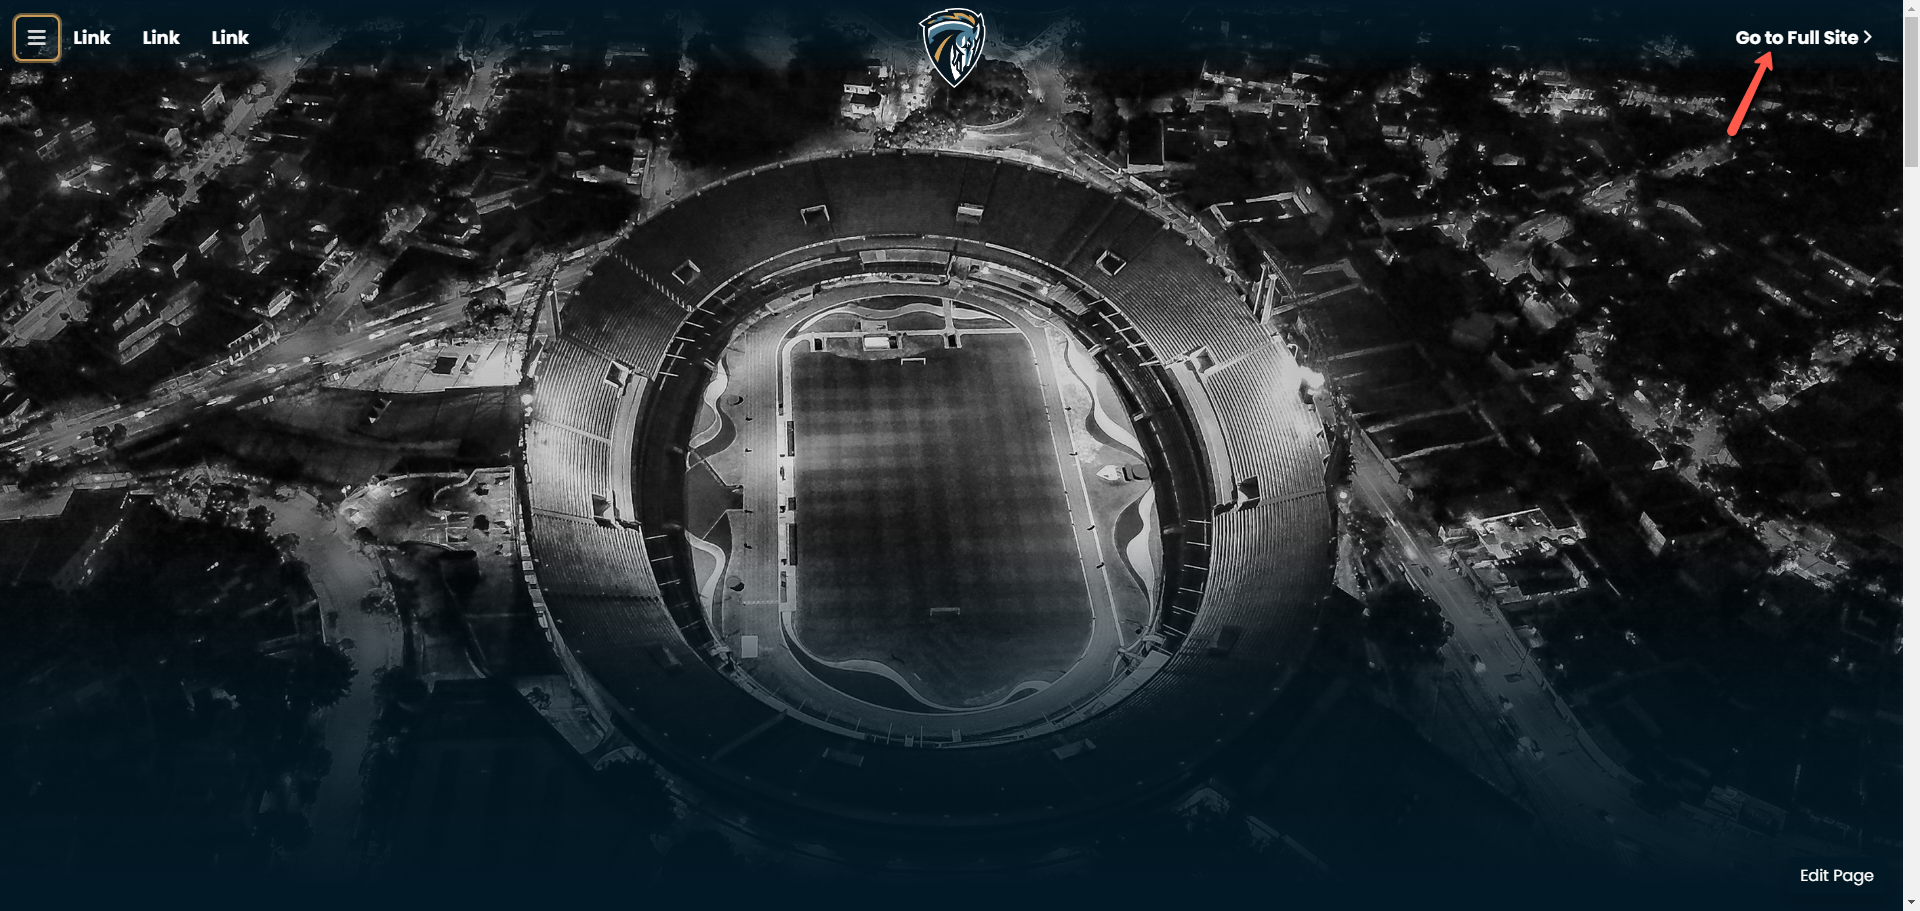
The header button is used to display a text button that can be connected to a URL. The main purpose of this button is to allow visitors to the microsite to navigate back to your main website. The only thing you should be adjusting with this button is the text that shows for the button. Here are instructions for updating this button:
Navigate to the section where the microsite is housed
Click edit content on the file named navbar-header-btn-link
Enter the text in the Label field that will show in the button (Ex. Go to Full Site, Main Site, etc.)
The Target URL field should have this filename- /index as this will direct visitors back to the main website homepage when they click on it. This is a faster redirect from that link than if you copy/paste the full website URL into this field, as that will make the website treat it like an external link instead of an internal one.
Once you have finished adjusting the text in the Label field click Save Changes
Video instructions:
Social Navbar

The social navbar displays icons for social media accounts that will be posting content related to the tournament/championship. That are supports displaying icons for the following social media platforms:
Facebook
Instagram
TikTok
Twitter
YouTube
Here are instructions for updating those icons:
Navigate to the section where the microsite is housed
Click edit content on the file named navbar-social
Enter the name of the social media platform in the Label field
Copy/paste the URL for the account page in the Target URL field
Click and drag to adjust the order of the icons
To change the title text above the icons click Edit Details, and then change the text in the Title field
Once you are finished making adjustments click Save Changes
Video instructions:
Tournament Information

The Tournament Information area is a text field where you can add additional details/information related to the tournament/championship, such as ticket prices, parking, etc. Here are instructions for updating this area:
Navigate to the section where the microsite is stored
Click edit content on the file named championship-info
Enter the text you want to display in the component within the text editor
If you want to adjust the title that shows at the top of the component, click Edit Details and then change the text in the Title field
Once you had completed updating those two areas click Save Changes
Video instructions:
Tournament Links
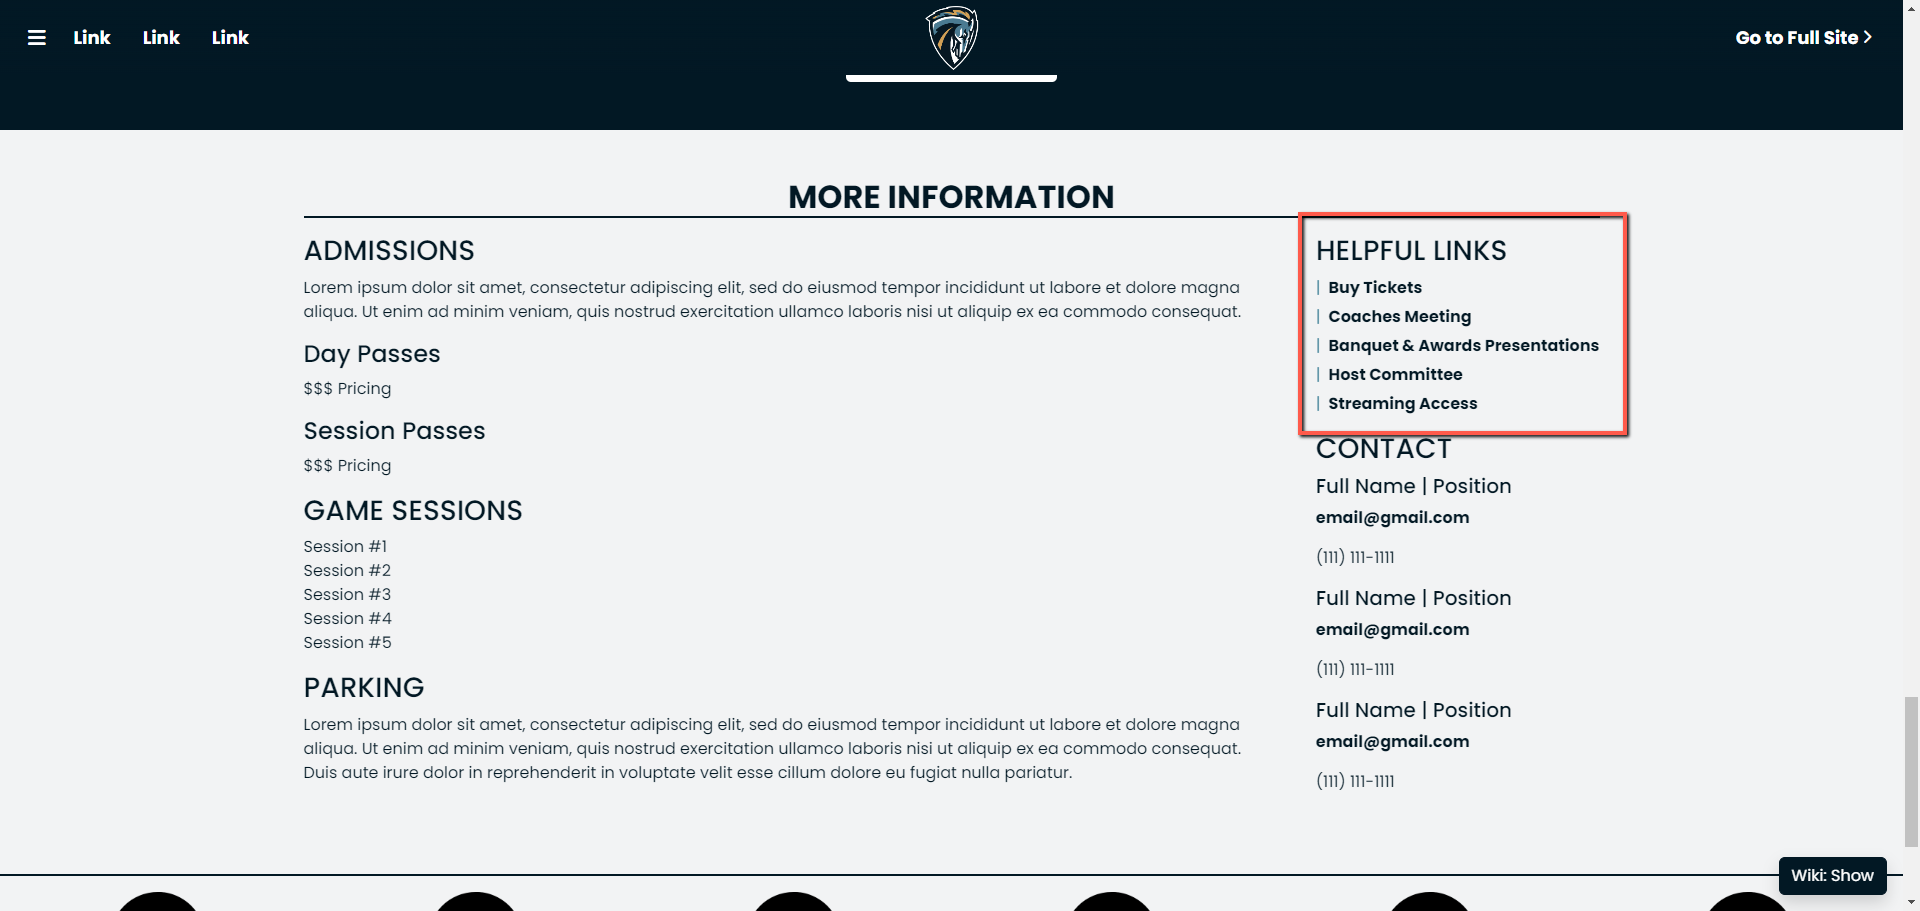
The Tournament Links area is an additional area to add links to the page separate from the links in the header of the microsite. Here are instructions for updating those links:
Navigate to the section where the microsite is housed
Click edit content on the file named championship-links
Enter the text at the top of the page that you want to show above the links (ex. Helpful Links, Tournament Links, etc.)
Enter the text you want to display for the links and then hyperlink the text by clicking the hyperlink icon in the toolbar
Click Save Changes
Video instructions:
Tournament Contacts

The Tournament Contacts area is used to display contact information for tournament administrators. Here’s instructions on how to update this area:
Navigate to the section where the microsite is housed
Click edit content on the file named championship-contacts
Enter the text at the top of the page that you want to show above the links (ex. Contact, Tournament Contacts, etc.)
Enter the contact information underneath the title text you put at the top of the page
Click Save Changes
Video instructions:
